 If you are a Java developer who wants to launch a new exciting career then don't miss this video. Discover how to apply your Java skills in MuleSoft. It could be your chance to start your career in MuleSoft development or improve your skills!
Watch our first meeting's recording to learn how to build APIs and compare the MuleSoft development experience to SpringBoot. Our organisers and presenters are Guilherme Pereira, Integration Architect from Infomentum, and Thimoty Barbieri, Engineering Consultant from ITECH.
- API Life cycle: How to make use of the API-First strategy to refine and create better APIs for your consumers;
- Mule Runtime: Main characteristics of the MuleSoft Runtime and how it's useful for many developments situations;
- Connectors: unlock data from third-party systems and create integrations faster.
Let us introduce a new Meetup group - MuleSoft for Java Developers. Our goal is not only to advocate MuleSoft but to demonstrate how you can leverage your previous Java experience and apply it in MuleSoft. If you don't know MuleSoft, you're in the right place. If you are already familiar with MuleSoft, you are also in the right place. We have a lot of content to share.
Today we have a very hands-on session. We've prepared plenty of working code that usually developers don't have access to. Tim and I will explain how to build APIs using MuleSoft and SpringBoot and compare both development strategies.
I want to look back and tell you the background of MuleSoft. It started as an open-source project in 2003. Ross Mason, the founder of MuleSoft, was a Java developer. He was frustrated with writing a lot of code - doing 'the donkey work'. Most of the companies Ross worked for had low integration standards. So he decided to create a project to connect multiple occasions using a lightweight ESB and standard protocols and provide some connections across the application networks. In 2006 MuleSoft was born; it became a MuleSoft officially in 2008. The core acquired many new features during the first years and gradually become one of the most widely used integration platforms. Let's look under the hood. The core of the platform is Mule, a lightweight engine written in Java. It's scalable and event-based. The Mule runtime has automatic thread control called EDA. It can manage all threads that you need to run during development or executing APIs.
With MuleSoft, you can establish connections with almost everything. The Anypoint platform offers more than 200 connectors out-of-the-box, including adaptors to Salesforce, SAP and Workday. All connectors work as a direct drop. So you can drag-and-drop it into your flow and start using it straight away. There are also connectors to various databases and providers, like CAFTA, REPT key, AWS, Google. In a rare case when no connector to your system of choice exists, there is an option to create a new one by extending its Java SDK.
At the top of the Mule runtime and the connectors, we have the design and portals. They play a crucial role in APIs development. Using the Design Portal, you can create API specifications and mocks, publish your assets, create API portals, or build new connections together with the other developers. MuleSoft is a completed platform not only to build but also to manage APIs.
Building your first APIs using MuleSoft
In this blog, I will guide you through how to build your first MuleSoft API to connect to Salesforce and expose some customer data.
You can find more information on this by watching our first MuleSoft for Java Developers Meetup - Building APIs with Mule and SpringBoot.
Use Case
In this use case, we will build an API on top of Salesforce to query the Contacts object and expose the data using our JSON specification.
Before start
Before you start, let's check your environment and make sure you have everything configured.
MuleSoft:
Download and install Anypoint Studio from here. Anypoint Studio is a visual IDE based on Eclipse and It already comes with a bundled Java JDK and Maven installations.
The Studio is free and you can use it without any restrictions to develop and test your APIs locally.
You can found more information about Anypoint Studio here.
Create a free trial account on Anypoint Platform to deploy your API to the cloud and test it.
Salesforce:
Create a free Salesforce developer account. Once you create it, you will need to request a security token that will be used in our implementation.
Create API specification
The first step in our development will be to start creating the API specification:
Go to Anypoint Platform → Design Center → Create new → New API Spec
Define the name (e.g., SFDC Contacts Sys API) and select the specification language to create the spec. Design Center supports OAS and RAML. In this example, let's use RAML.

Let's define our first our type that will represent a Contact for our API
|
types: ContactResponse: properties: id: type: string required: true firstName: lastName: email: address: required: false properties: address: city: zipCode: country: phone?: dateOfBirth?: date-only |
By default, RAML spec assumes string type for properties we didn't declare explicitly.
The trailing question mark (?) is a shortcut to declare a property as non required.
Now let's include the resource definition to our specification:
|
/contacts: get: queryParameters: email: pattern: ^.+@.+\..+$ responses: 200: body: application/json: type: ContactResponse example: !include examples/customer-response.json |
In this example, a simple regex pattern definition was defined to validate the query parameter email
The example file included will generate data for the embedded Design Center mocking server
customer-response.json example:
|
{ "id": "3d510280-d1dd-455e-acf8-24dcfed2a548", "firstName": "John", "lastName": "Smith", "email": "john.smith@wow.com", "address": { "address": "217, Main Street", "city": "New York", "zipCode": "9823-0", "country": "US" }, "phone": "+1 123 43234", "dateOfBirth": "1989-09-01" } |
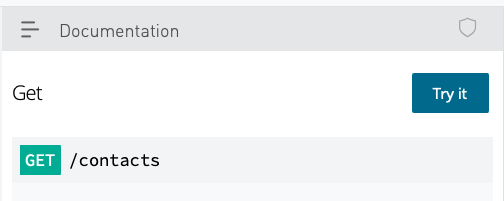
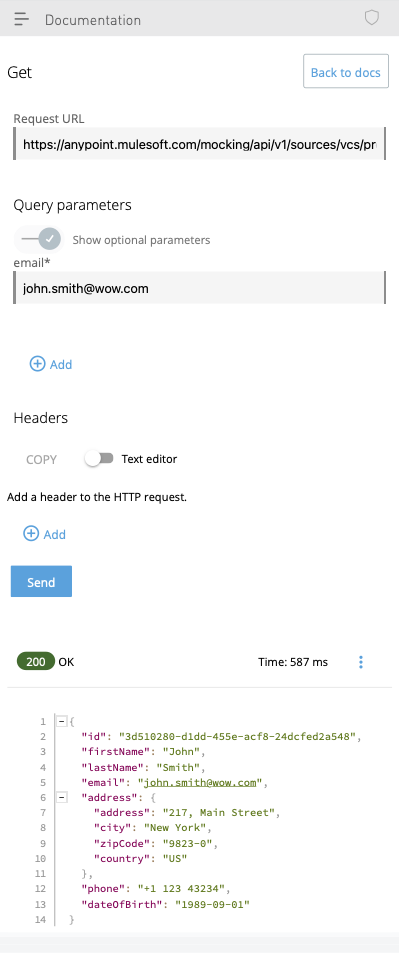
With the RAML spec defined, we can interact with the API Console at the Design Center and validate our API specification.
Select the resource and click on Try it.
The Design Center provides a complete environment to design, prototype and test your API spec. You can validate the behaviour of the API and check if everything is working before starting the development.
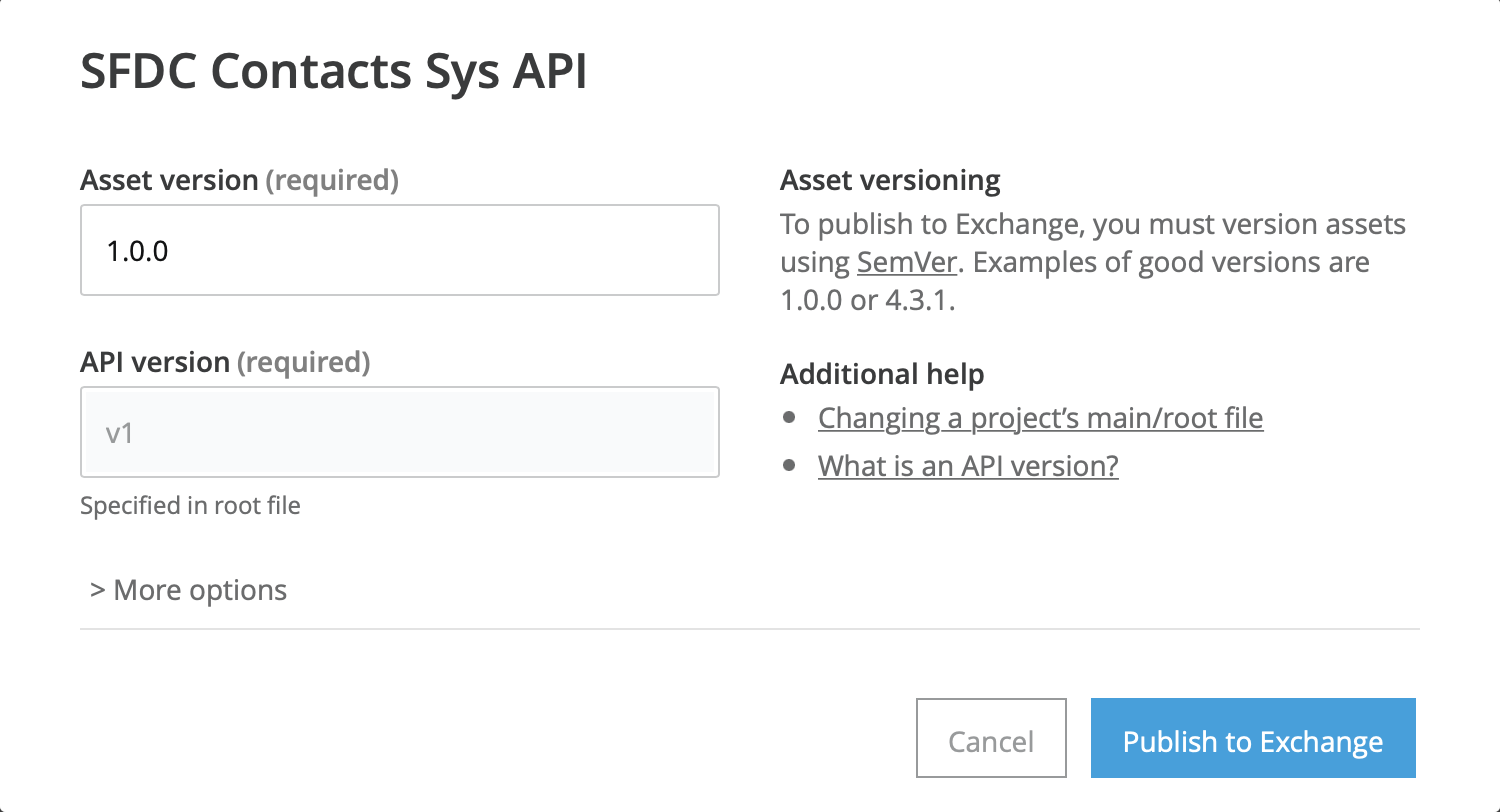
The final step is to publish the API specification to the Anypoint Exchange. Exchange is an asset portal and the place where others developers will be able to discover your API and consume it.
On the top right corner from Design Center select Publish → Publish to Exchange
Define the version of your asset and click on Publish to Exchange
Implement the API
Once we have defined our API specification it's time to start the implementation using Anypoint Studio.
Select File → New Mule Project
Define the project name and in the API Implementation section click on Add new dependency and then select from Exchange.
At the add dependency window, search for your API specification, add it to you project and click Finish. At this point, you are ready to create your project.
|
|
|


Its required to connect Anypoint Studio to the Anypoint Platform account. Click on Add Account and then insert your credentials.
The Anypoint Studio will generate a skeleton implementation project with the basic structure and flows to be implemented.
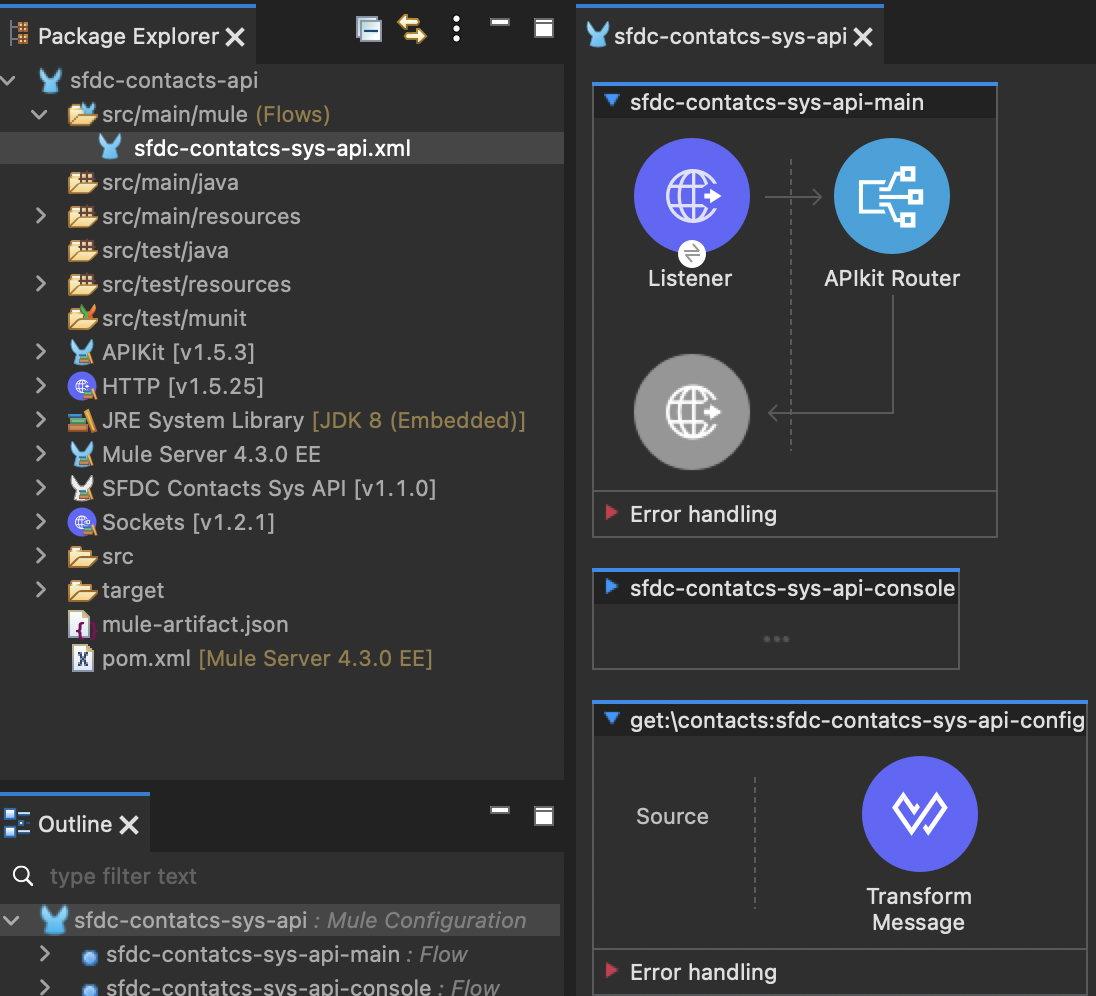
MuleSoft offers out-of-box modules and connectors that provide connectivity with different protocols and systems. In this project, Anypoint Studio already adds some modules dependencies automatically when we create the project like HTTP and API kit.
HTTP module will offer support to create HTTP/HTTPs server that will host our API and APIkit offers support to RAML/OAS specifications. It generates the API skeleton and provides validation against the specification.
In this use case, we will add the Salesforce connector to our implementation. It offers support for the Salesforce API providing multiple operations to be used in the implementation flows and also support for metadata.
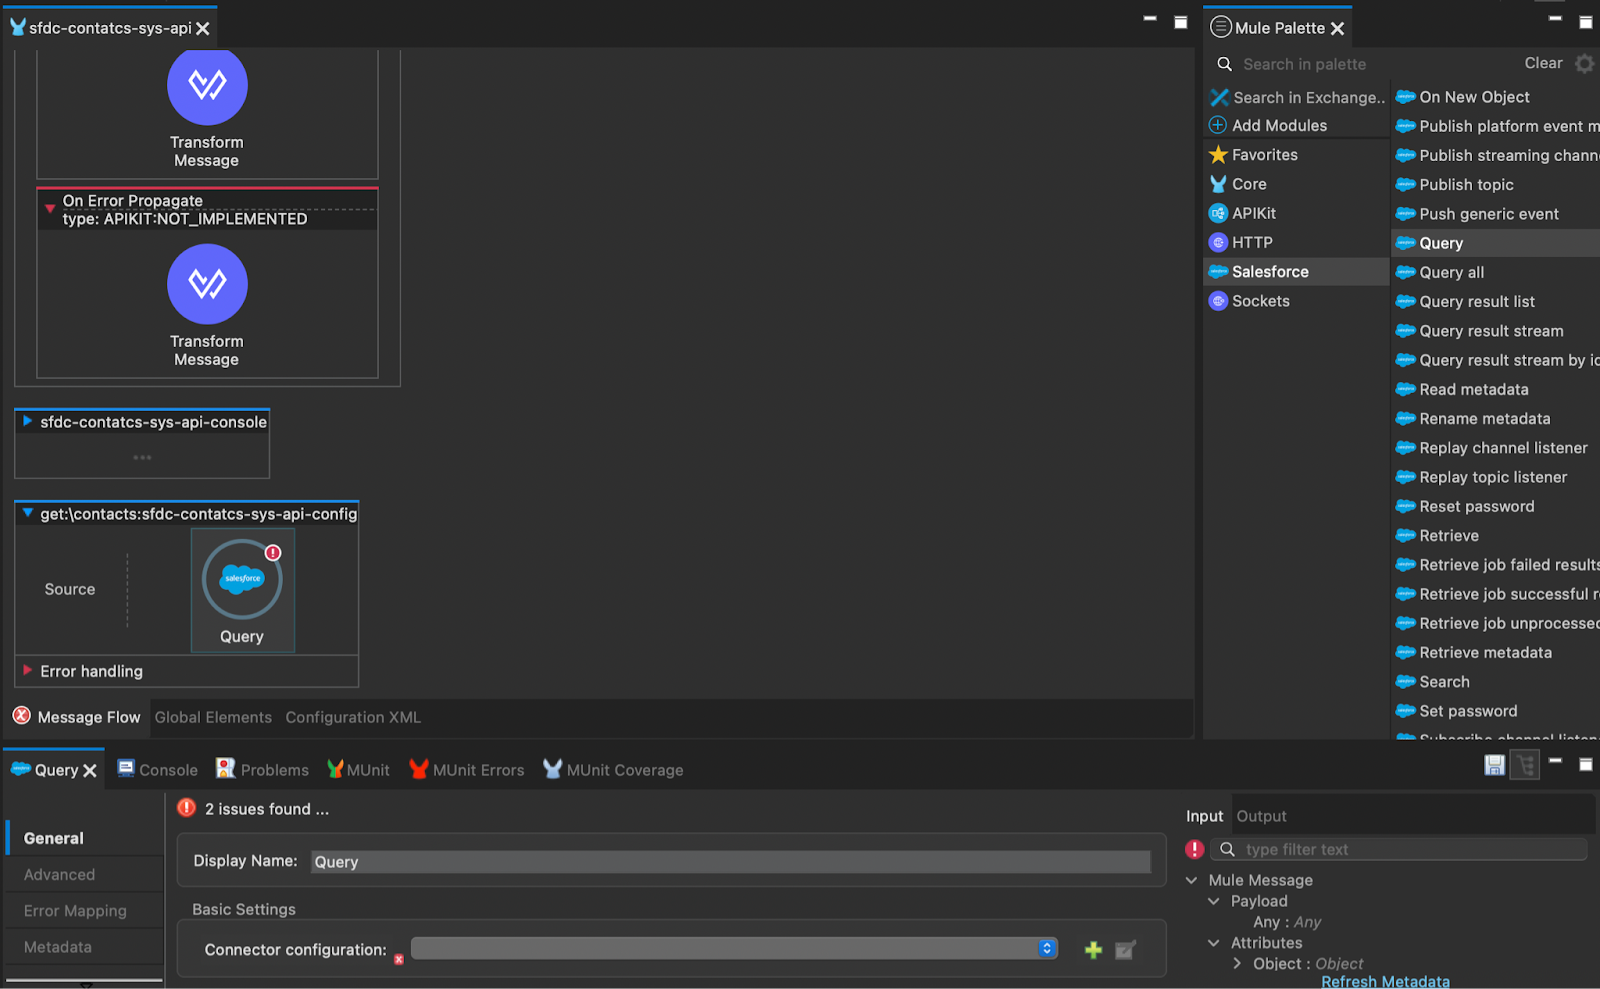
On the Mule Palette click on Add Modules and then select Salesforce and drag and drop it to your project dependencies.
Click on Salesforce, select the Query operation and drag and drop it to the flow: get:\contacts:sfdc-contatcs-sys-api-config
Delete the auto-generated Transform Message component from the flow. It's generated by default based on the examples we provided in the specification.
Now it's time to configure the Salesforce connector to connect with our Salesforce developer account.
Select the Query operation in the flow and go to the configuration tab. Click on to Add a new Connector configuration.
At the connector configuration keep the Connection type as Basic Authentication and fill in the following information:
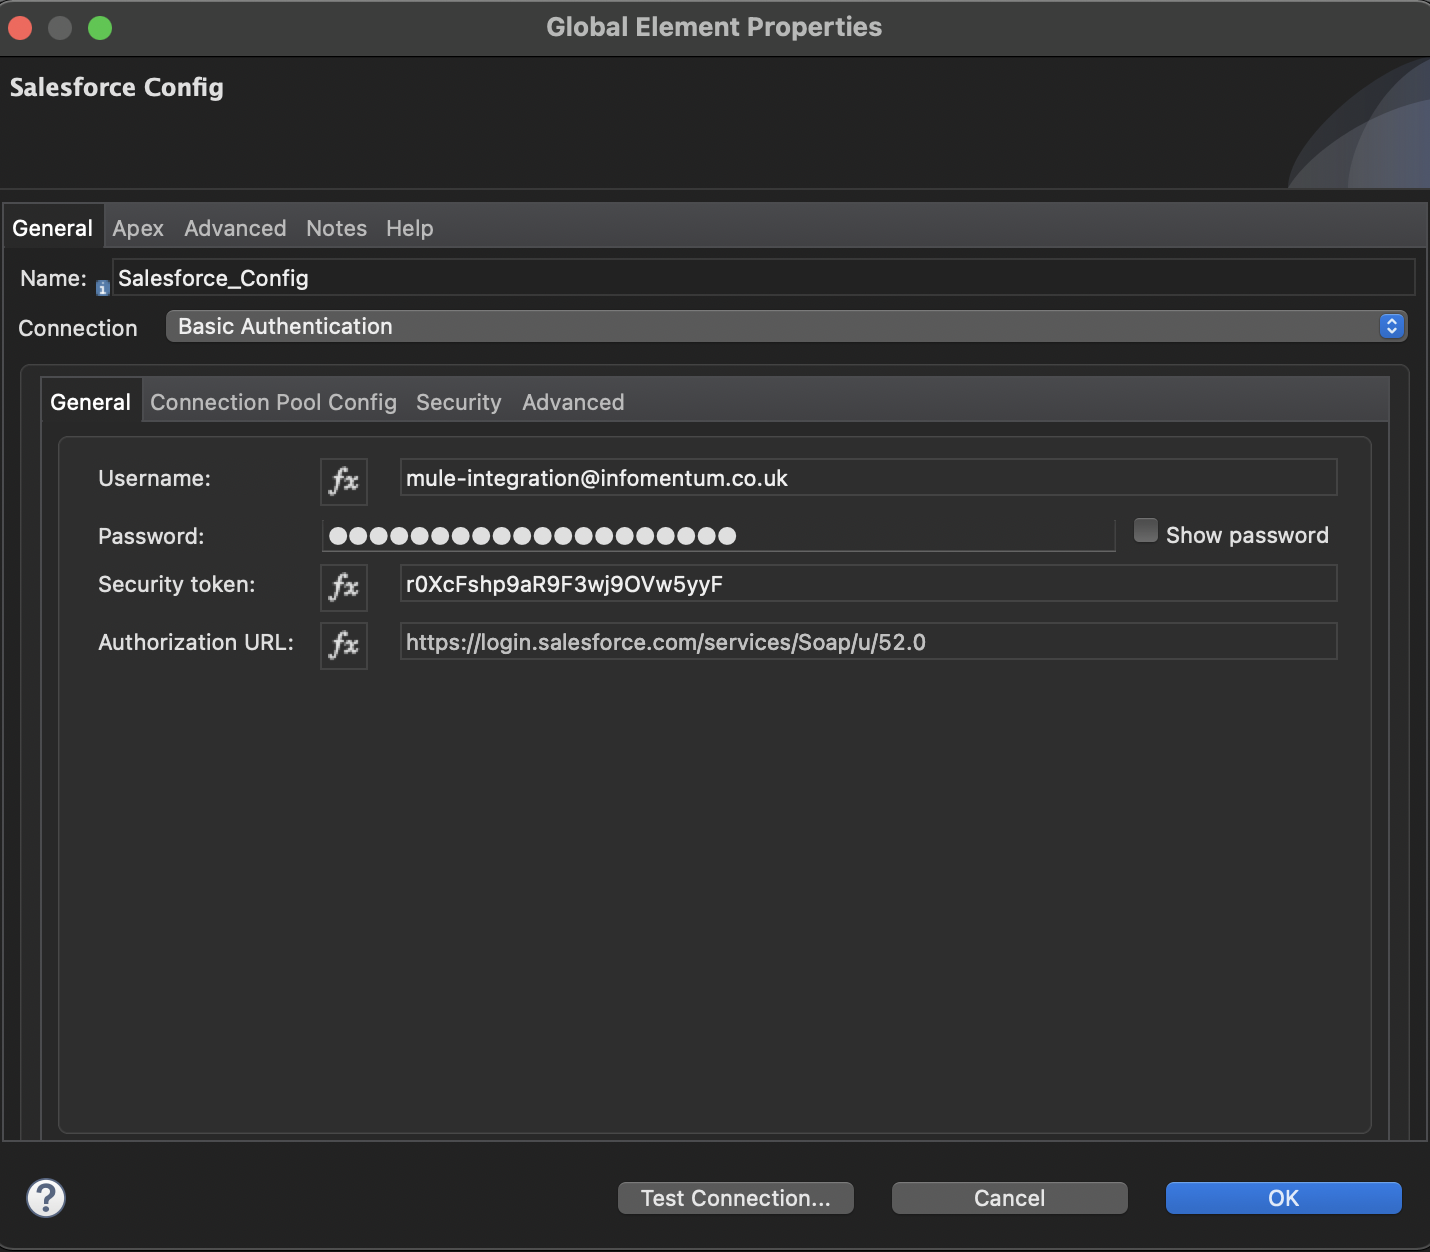
Username: The username you have used to create the developer account
Password: The password of the user
Security Token: The security token requested before creating the developer account
Click on Test Connection and make sure everything is working correctly. Click on OK to close the config.
With the Salesforce connection configured we can now define the query used to extract the Contact information and filter the data using the email query parameter.
In the connection operation configuration insert the SOQL in the Salesforce query:
|
SELECT Id,FirstName,LastName,Email,Birthdate,Phone,MailingStreet,MailingCity,MailingCountry,MailingPostalCode FROM Contact WHERE Email = ':email' |
In the query, we defined as parameter the field Email as a WHERE condition and we need to specify from where Mule will extract this information. In our case, we will extract from the HTTP query parameters.
Go to Parameters, switch to expression mode and define the following expression to extract the email from the HTTP query parameters and associate it with the SOQL param:
|
{ "email" : attributes.queryParams.email } |

In the Output metadata panel, you will be able to see all the metadata extracted from the Salesforce connector.
At this point, we already have the ability to connect to Salesforce and query data and now it's time to transform this data to our JSON model.
Anypoint Studio can retrieve the metadata from the connector we used in our integration and also has the ability to read the metadata expected from our API specification. It's part of the job of the API kit module which read the specification and provides to Studio the input and output metadata for the API.
Let's transform the data from the Salesforce which basically is an object to the JSON model expected for our resource implementation. Go to the Mule Pallete drag and drop a Transform Message component to the flow, make sure to position this component after the Salesforce connector.
At the right panel of the Transform Message component you see the metadata provided by the Salesforce connector and at the left side the metadata expected by the resource flow implementation which represents the data type provided in our specification.
You can now create your transformation mapping the values from the Salesforce to the data type and change the output of the transformation to application/json:
|
%dw 2.0 output application/json --- { id: payload[0].Id, firstName: payload[0].FirstName, lastName: payload[0].LastName, email: payload[0].Email, address: { zipCode: payload[0].MailingPostalCode, country: payload[0].MailingCountry, address: payload[0].MailingStreet, city: payload[0].MailingCity }, phone: payload[0].Phone, dateOfBirth: payload[0].Birthdate } |
Since Salesforce query it will always return an array, we will extract the information from the first element of this array

We finished our implementation now we can run it locally and test it. Right-click on the flow and click Run project
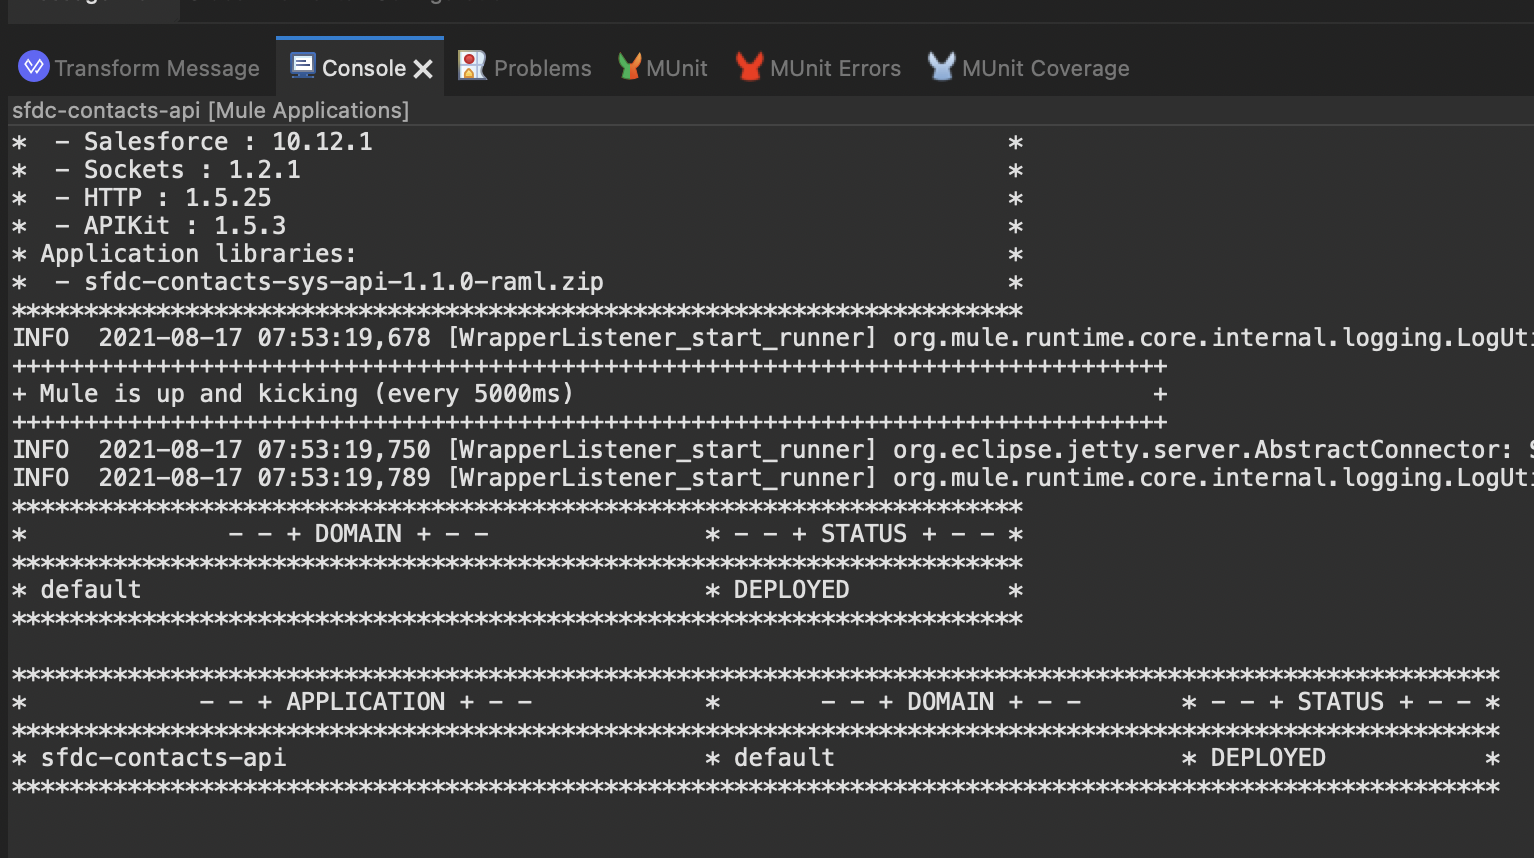
Once deployed run a simple request in your local machine to test it:
|
curl --location --request GET 'http://localhost:8081/api/contacts?email=jrogers@burlington.com' |
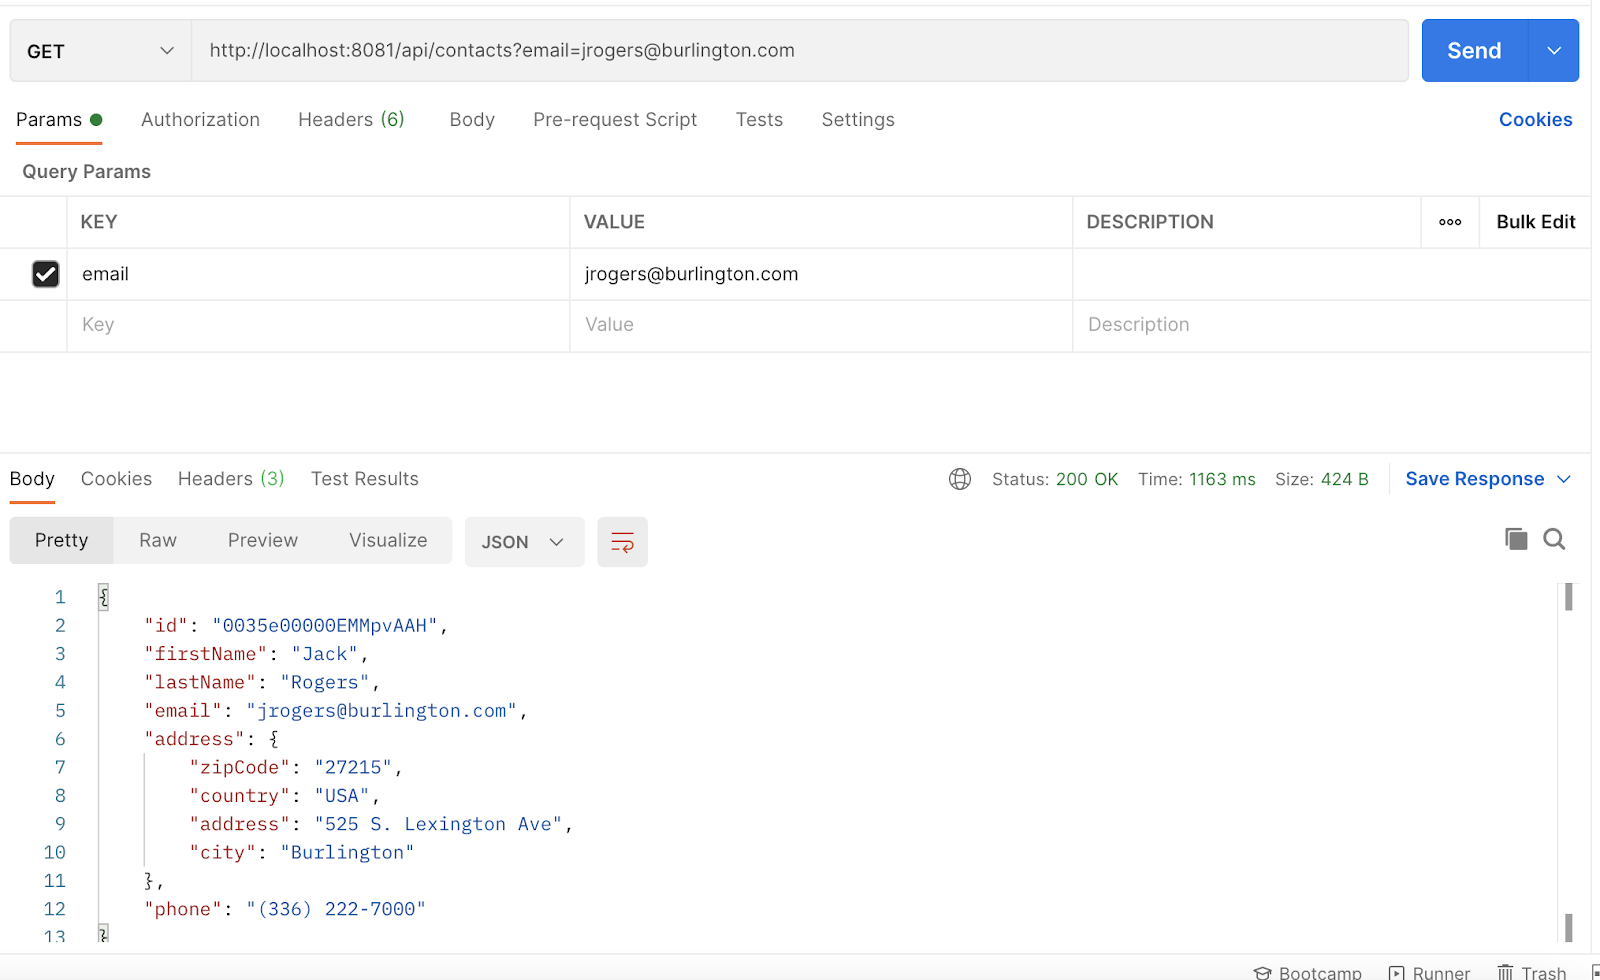
The basic functionality is working and the API can connect to the Salesforce, query the data and return as JSON format following our data model specification.
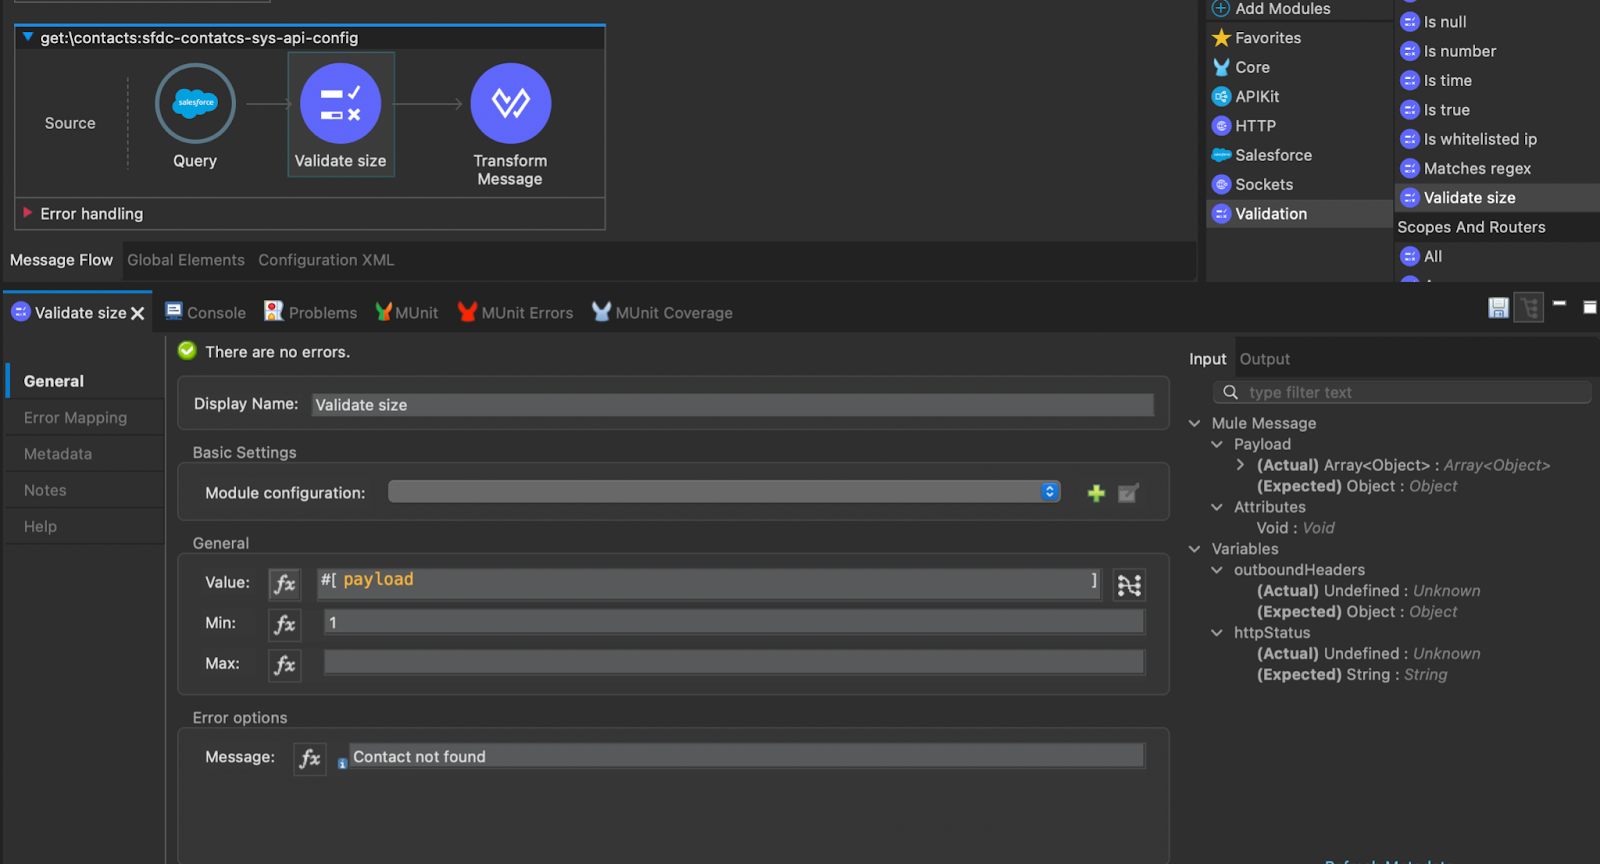
Now let's add a simple validation in our implementation to return a 404 Not Found when querying a non-existent email in the Salesforce data.
Go to the Mule Palette click on Add Modules and then select Validation and drag and drop it to your project dependencies.
Click on Validation and select Validate size and drag and drop it to your flow and insert it after the Salesforce connector.
In the General tab on Value insert the following script: #[payload]
Change the Min configuration to 1
In the Errors options tab message on the field message insert: Contact not found
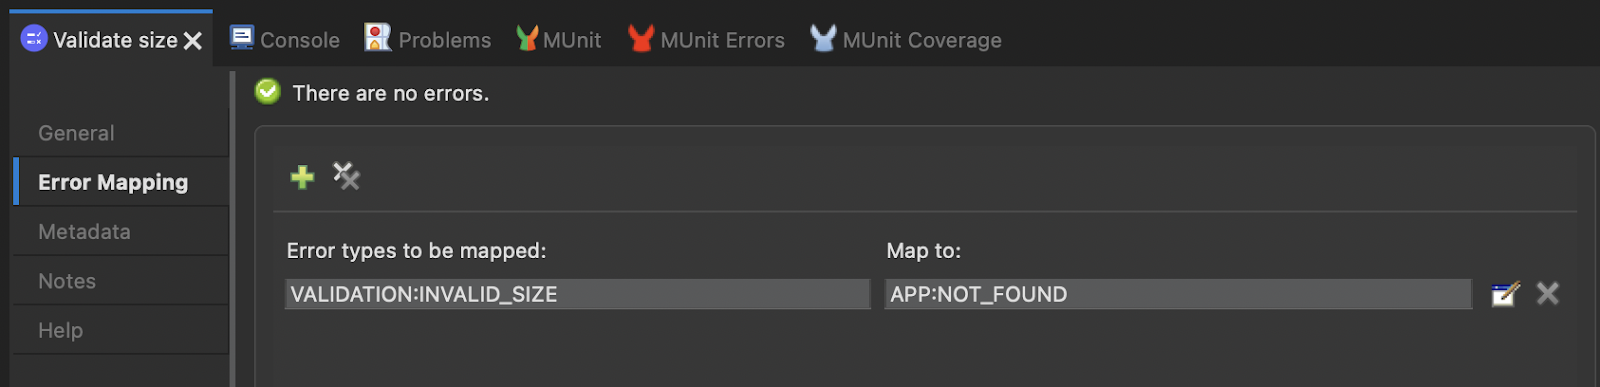
Click on Error Mapping and map the following error:
VALIDATION:INVALID_SIZE → APP:NOT_FOUND
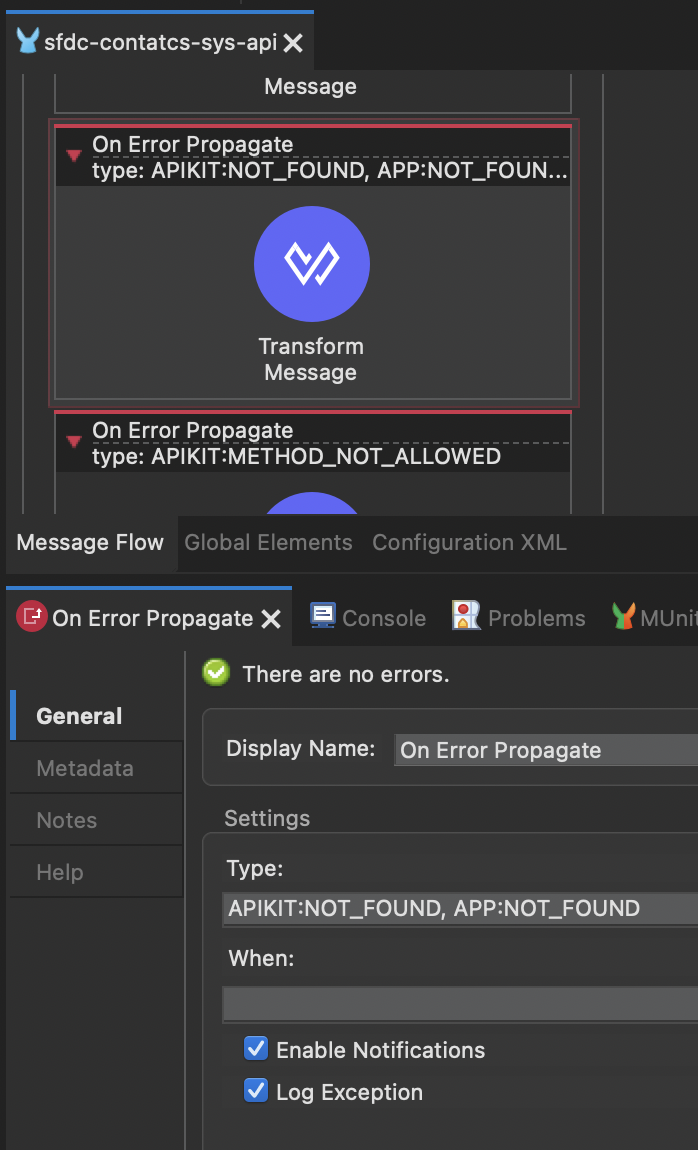
Go to the sfdc-contatcs-sys-api-main flow and in the Error Handling scope select On Error Propagate type: APIKIT:NOT_FOUND
In the Type section insert a comma and then: APP:NOT_FOUND and save your project.
We mapped in the API Erro Handling a new error generate by our new validation module. So, every time the Salesforce connector returns an empty payload, we will generate a new error that will be mapped as 404.
Let's rerun the API locally to test this new behaviour. Once deployed, run a simple request in your local machine to test it:
|
curl --location --request GET 'http://localhost:8081/api/contacts?email=test@test.com' |
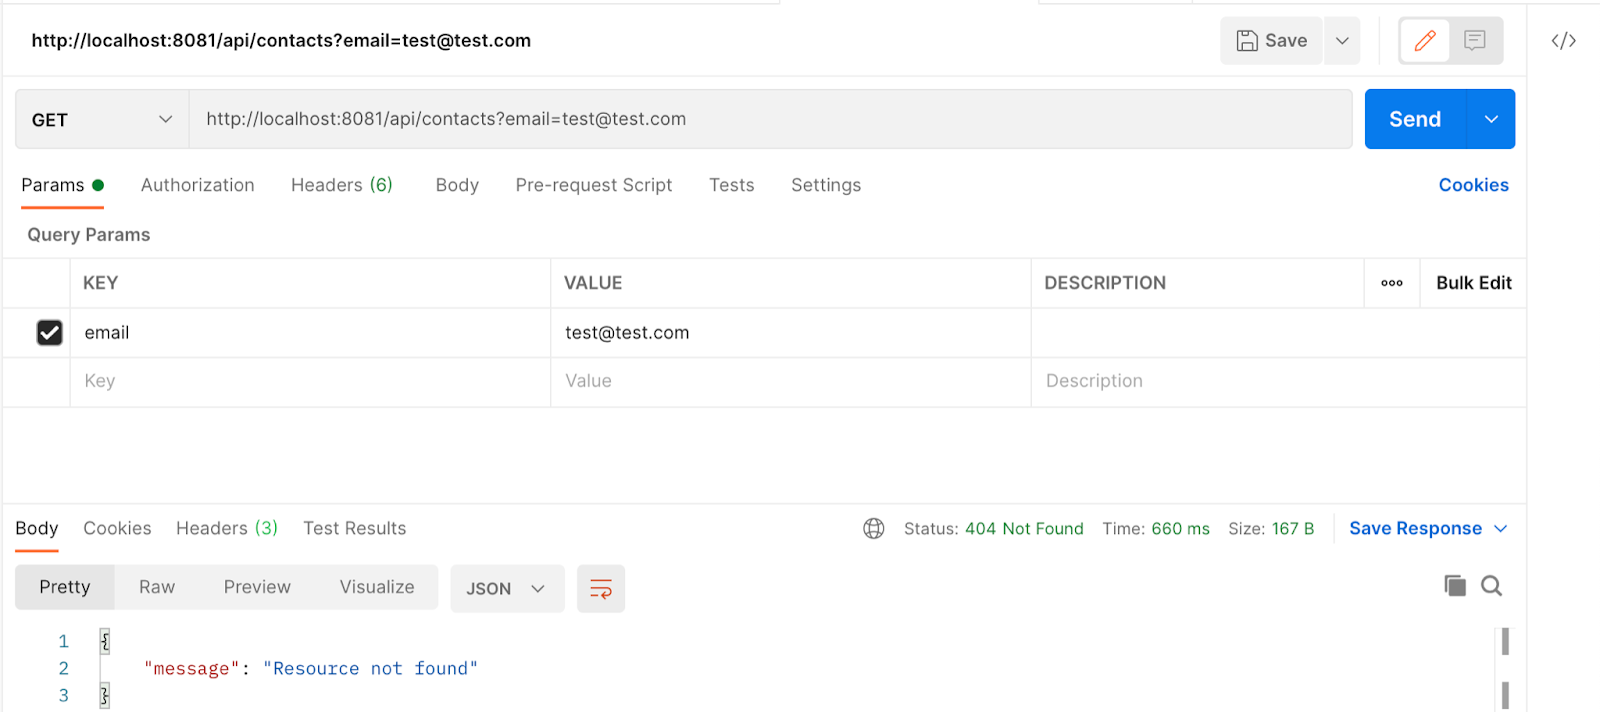
Now our API will return 404 when we inform a non-existent email.
Deploy the API to CloudHub
We finished our API implementation, test it locally and now we can deploy it to the CloudHub.
CloudHub is an iPaaS platform supported and managed by MuleSoft to deploy your APIs to a cloud environment.
Right-click on the project and go to Anypoint Platform → Deploy to CloudHub

A new window will open and where you can define the API name, runtime version, worker size and other configurations related to the deployment.
Define a valid API name (it must be unique) and let's keep the most values as default. Then click on Deploy Application.

In the next window click on Open in the Browser to follow up de deployment to the CloudHub.
Anypoint Platform will provide all the required infrastructure to deploy the API.
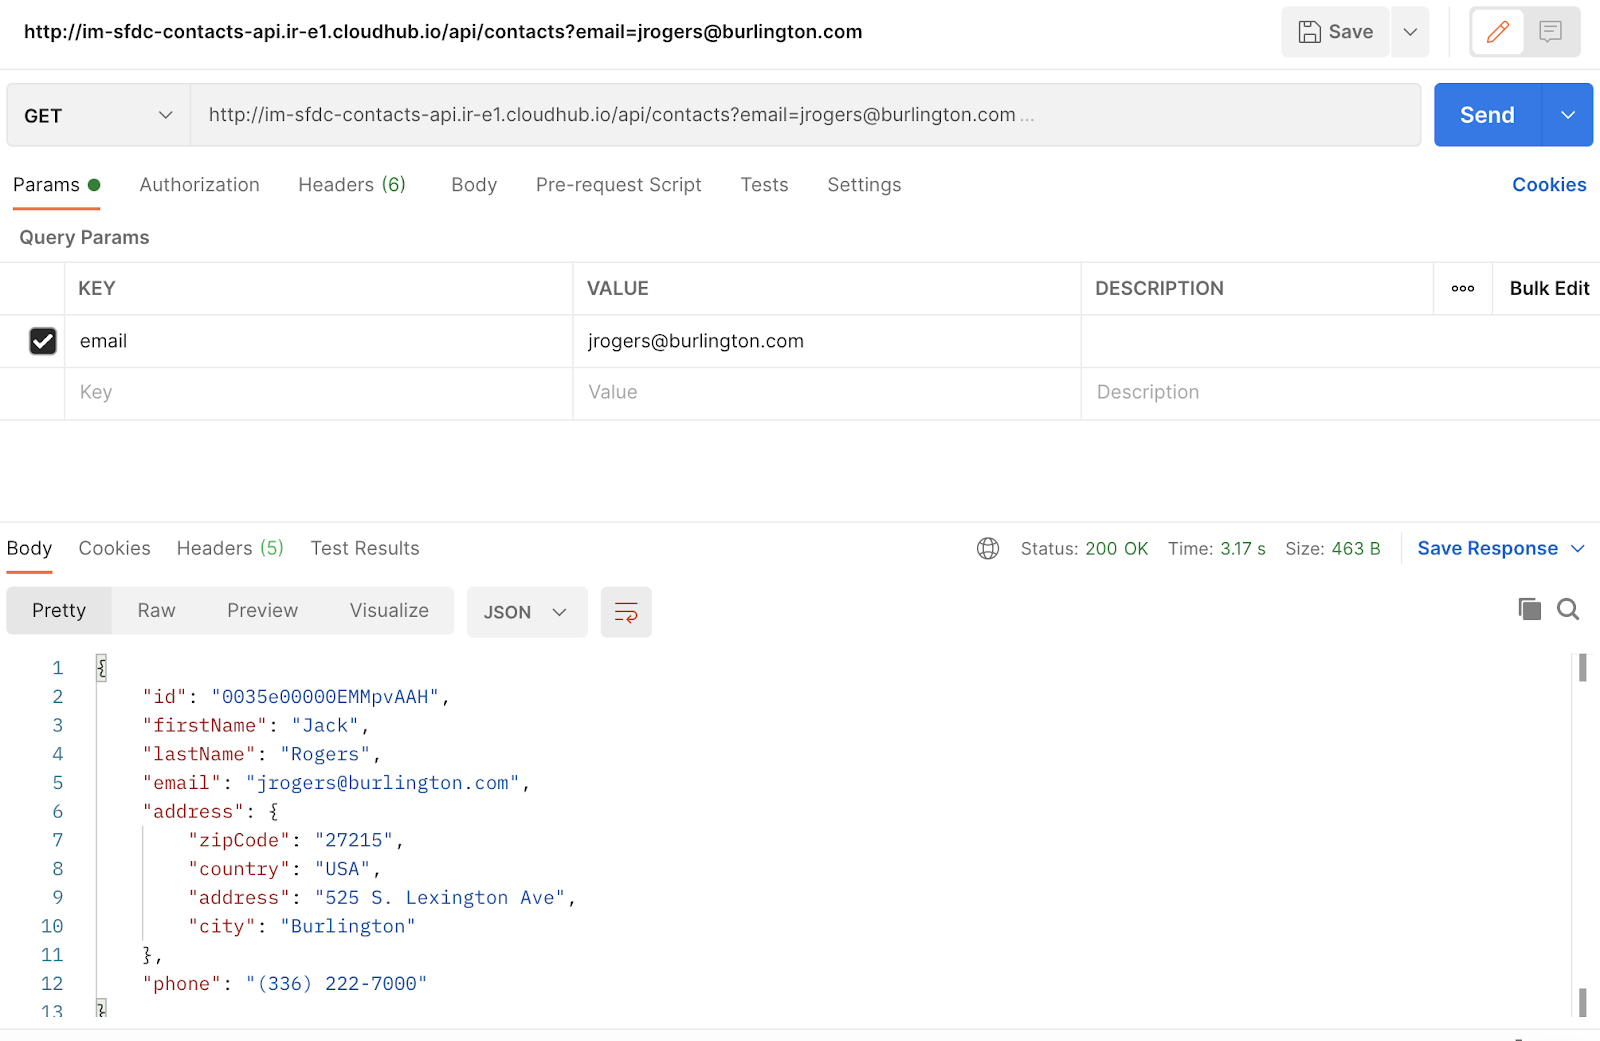
Once it is finished the status will change to Started and you will be able to send requests to the cloud instance:
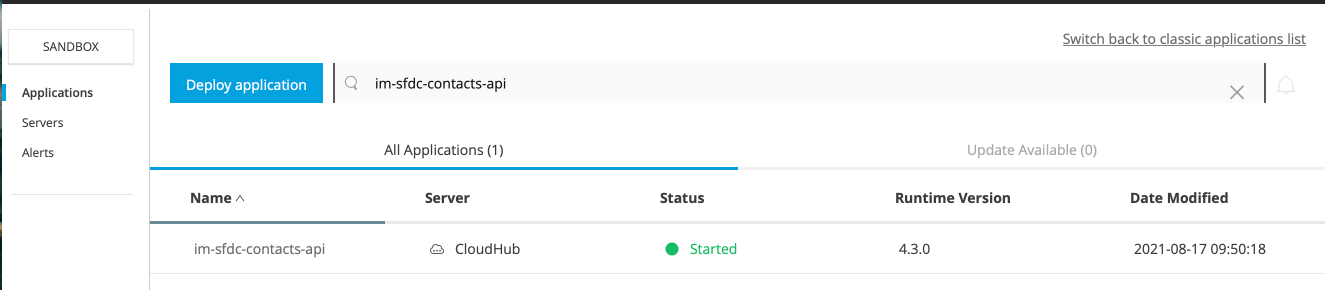
Click on the API to show the details and to get the URL to provide the requests. Copy the link informed in the Domain.

Let's run a new request now pointing to the CloudHub environment:
|
curl --location --request GET 'http://your-cloudhub-url/api/contacts?email=jrogers@burlington.com' |
Conclusion
The objective of our first meetup was to demonstrate how simple is to create your first API using MuleSoft comparing with Java Spring Boot.
You can find more information in our meetup recording available on our page and if you want you can check the code of this example here.
The spring boot version can be found here.
Stay tuned on our meetup page for more content and new events!